Set Up Your Instructional Area by Terra Graves
 There is so much to do to get ready for a new school year. Setting up your classroom in an organized and efficient manner will help you start the year out right. There are several areas of the classroom that need attention and setting them up well in the beginning is key.
- Your instruction/instructional area could be your desk, a large table at the front of the room, or a podium with a table next to it.
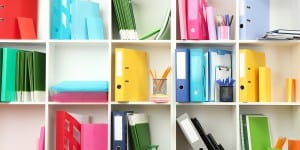
- Your instruction area should include these items: plan book, teacher’s manuals, current lessons file, pencil cup, scrap paper, Monday-Friday trays/files, Class period trays/files.
- Your teacher’s manuals or other instructional materials should be close to the instruction area. A good way to store them is in a crate on the floor.
- Create a current lessons file for your instructional area. One option is to have a hanging file crate that sits on the desk or table, with a hanging file for each subject.
- In your current lessons file keep copies of all handouts and other materials you are currently using, i.e., mostly things you will be using for the current grading period. For example, if you are teaching fractions in Math, you will want to have your entire fractions file available when you are doing your planning.
- Keep a pencil cup in your instruction area. The cup should be stocked similarly to the one on your desk.
- Keep scrap paper in your instruction area. Scrap paper is useful for many things. You can work out math problems with students one-on-one, write reminders to yourself, or just about anything you can think of.
- Monday-Friday or Class Period trays/files are probably the most important part of your instruction area. Use stacking trays or hanging files to create the Monday-Friday or Class Period trays/files depending on your needs. Label the trays/files with the days of the week.
- After you have planned your week(s), copied the necessary handouts, and gathered the necessary materials, put them in their corresponding days in the Monday-Friday or Class Period trays/files. So when Monday rolls around again, all of your stuff is ready to grab right there! You can even copy materials more than a week ahead and just label it with the correct date and put it in that day’s tray underneath the more current “stuff.”
- Keep some of your supplies such as copy paper, note paper, markers or crayons, tape, overhead markers and so on in your instruction area for easy access.
© Terra Graves. Terra is an educator in Reno, Nevada. She has been a classroom teacher (elementary and middle school) and a mentor teacher (K-12). She continues to educate teachers through professional development courses and is currently the professional development coordinator for the Nevada Pathway Project, a technology integration project for middle school teachers across Nevada.
Terra is the author of Organized Teacher, A Guide for Beginning Teachers, and 102 Classroom Set-Up Tips for the Organized Teacher. These items are available for purchase and immediate digital delivery at: www.teachingjustgoteasier.com
Follow Terra on Twitter: @teachingeasier
 And if you liked these tips you may be interested in the Get a Plan! Guide® to Ridding Your Workspace of Clutter part of the Get a Plan! Guides® series designed to give you the ideas and inspiration to do your work easier, faster, and in a more focused fashion.